
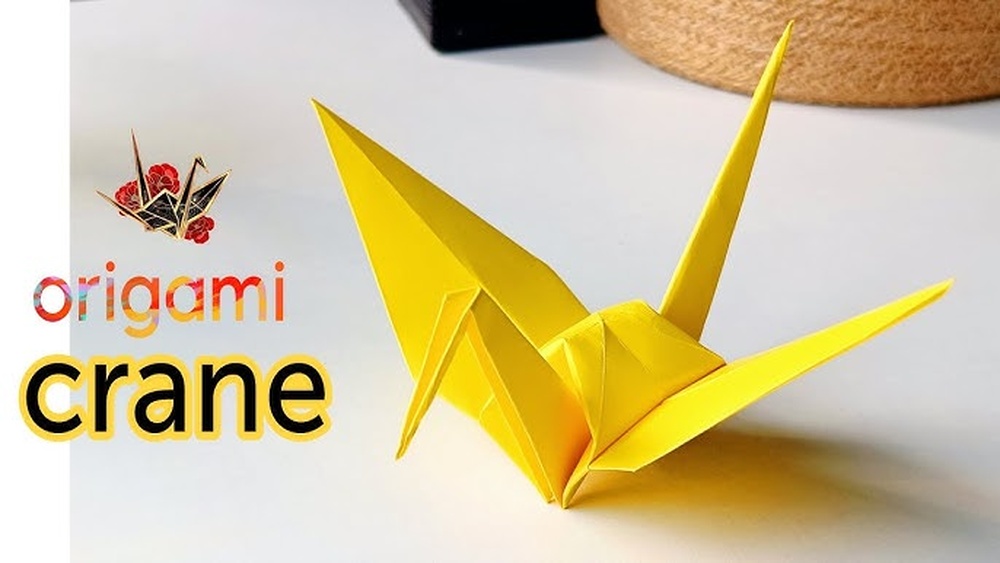
Have you ever wanted to create something beautiful with just a simple sheet of paper? Making a crane bird with paper is not only fun but also a great way to relax and boost your creativity.
In this guide, you’ll discover easy, step-by-step instructions that anyone can follow—no special skills needed. By the end, you’ll hold a delicate paper crane in your hands, a symbol of peace and hope. Ready to surprise yourself with what you can make?
Let’s get started!

Materials Needed
Starting a paper crane project requires the right materials. These items make folding easier and more fun. Gather everything before you begin to avoid interruptions.
Paper
Choose square paper for the best results. Origami paper is ideal because it is thin and easy to fold. If you don’t have origami paper, cut any paper into a perfect square.
Flat Surface
A clean, flat surface helps with precise folds. Use a table or desk to work comfortably. Avoid soft surfaces like beds or couches.
Bone Folder Or Crease Tool
This tool sharpens the folds for a neat finish. You can use a plastic card or your fingernail instead. It helps keep the paper crisp and clean.
Patience And Attention
Making a paper crane needs patience. Follow each step slowly. Pay close attention to details to get perfect folds.

Choosing The Right Paper
Choosing the right paper is key to making a beautiful crane bird. The paper’s size, thickness, and texture all affect the folding process. Good paper folds easily and holds sharp creases. It should be strong enough to avoid tearing during folding.
The wrong paper can make your crane look messy or uneven. Thin paper may tear, while thick paper can be hard to fold. Picking the right paper helps your crane look neat and last longer.
Paper Size Matters
Start with square paper. The most common size is 6 inches by 6 inches. This size is easy to fold and handle. Larger paper works too but can be tricky for beginners. Smaller paper is harder to fold accurately.
Choosing Paper Thickness
Origami paper is thin but strong. It folds well and keeps creases sharp. Avoid thick paper like cardstock or construction paper. Thick paper is stiff and hard to fold. Thin paper is delicate but works best for detailed folds.
Texture And Color Options
Smooth paper is easier to fold than textured paper. Patterns and colors add beauty to your crane. Choose colors you like. Plain colors highlight the shape well. Patterns add fun but can hide folds.
Preparing The Paper
Preparing the paper is the first step to make a beautiful crane bird. The right paper helps the folds stay sharp and clean. It also makes the final crane look neat and balanced.
Choosing the correct size and type of paper is important. Paper that is too thick or too thin will not fold well. Picking the right paper makes folding easier and more fun.
Choosing The Right Paper Size
Start with a square paper. The most common size is 6 inches by 6 inches. Bigger paper is easier to fold, but a smaller size makes a delicate crane. Cut a regular paper into a perfect square before folding.
Picking The Best Paper Type
Use origami paper or lightweight paper. Regular printer paper works if it is not too thick. Avoid cardboard or glossy paper. Thin paper folds better and helps create sharp edges.
Preparing The Paper Surface
Make sure the paper is clean and flat. Remove any wrinkles by smoothing with your hands. A flat surface helps to fold the paper evenly and precisely. This step improves the final look of the crane.
Folding The Base
Folding the base is the first important step in making a paper crane. This part creates the main shape. It sets the foundation for all the other folds. Getting this right makes the rest easier.
The base starts with a square piece of paper. Folding it carefully ensures a neat crane. Take your time and make crisp folds. This keeps the paper strong and tidy.
Fold The Paper Diagonally
Place the paper flat on a surface. Fold it in half diagonally to form a triangle. Press down to make a sharp crease. Then, unfold the paper back to the square shape.
Fold The Paper Diagonally The Other Way
Now fold the paper diagonally the other way. This creates another triangle crossing the first fold. Press down firmly. Unfold again to reveal an X crease on the paper.
Fold The Paper In Half Horizontally
Next, fold the paper in half from top to bottom. Make a neat crease and press down. Unfold the paper back to the square shape once more.
Fold The Paper In Half Vertically
Fold the paper in half from left to right. Press down firmly to make a clear fold. Then, unfold the paper again. You will see a plus sign along with the X.
Bring The Corners Together
Hold the paper by two opposite corners. Push these corners toward each other. The paper will collapse into a smaller square. Flatten the square by pressing the folds together well.
Creating The Wings
Start by folding the paper carefully to shape the wings. Make sharp creases to help the wings stand out. This step gives your crane its classic look and helps it balance.
Preparing The Paper For The Wings
Start with a square paper for balanced wings. Choose a lightweight paper for easy folds. Place the paper flat on a clean surface. Smooth out any wrinkles before folding. This helps the wings look neat and crisp.
Folding The Wing Base
Fold the paper diagonally to form a triangle. Crease firmly along the fold line. Unfold and repeat on the opposite diagonal. These folds create guides for shaping the wings. Next, fold the paper into a smaller triangle. This forms the wing’s base structure.
Shaping The Wings
Fold the edges inward to meet the center crease. This narrows the wings and adds detail. Make sharp creases for a clean look. Flip the paper and repeat on the other side. The wings start to take a bird-like shape here.
Final Wing Adjustments
Gently pull the wings apart to open them up. Adjust the angles for a natural, spread-wing look. Flatten any uneven folds carefully. Check that both wings are symmetrical. These small tweaks bring your paper crane to life.
Shaping The Head And Tail
Shaping the head and tail is a key step in making a paper crane bird. These parts give the crane its unique look. Careful folds create the delicate head and the long, graceful tail. This stage requires patience and gentle hands.
Both the head and tail start from the same folded points. Small, precise folds will turn these parts into the classic crane shape. The head needs a tiny beak, and the tail should be slim and pointed.
Folding The Head
Begin by choosing one end of the paper for the head. Fold the tip down gently to form the crane’s beak. Make a small crease to keep the beak sharp. Avoid making the fold too thick. The head should look neat and slim.
Creating The Tail
On the opposite end, fold the paper upward for the tail. Keep the fold straight and tight. The tail needs to be longer than the head. Press the edges to make the tail sharp and clean. The tail gives balance to the crane’s shape.
Final Adjustments
Final adjustments bring your paper crane to life. These small changes make your crane look neat and balanced. Spend a few moments here to perfect your creation. Your paper crane will stand out with just a little care.
Shaping The Wings
Bend the wings gently to create a natural curve. Avoid sharp creases that can tear the paper. Slightly lift the tips to give your crane a graceful look. This step adds a sense of motion and elegance.
Aligning The Head And Tail
Check the head and tail for symmetry. Fold the head down carefully to form the beak. Adjust the tail so it points opposite the head. Balanced features make your crane visually pleasing.
Crease Reinforcement
Run your fingernail along key folds to sharpen edges. Strong creases hold the shape longer. Be gentle to prevent ripping the paper. Reinforcing folds gives your crane a crisp finish.
Final Positioning
Set your crane on a flat surface. Adjust wings and tail to keep it steady. Make sure it can stand or rest without tipping. This final step prepares your crane for display or gifting.
Tips For Perfect Folds
Folding paper to make a crane bird needs care and attention. Perfect folds create a neat and beautiful crane. Small mistakes can change the shape and look of the bird.
These tips help make each fold sharp and exact. Follow them to enjoy the art of origami and create a crane you will like.
Use Thin And Crisp Paper
Choose paper that is thin but strong. Thick paper is hard to fold neatly. Thin paper folds smoothly and holds creases well. Origami paper works best for making cranes.
Fold On A Hard, Flat Surface
Place your paper on a flat table or desk. A hard surface helps make clean folds. Avoid folding on soft surfaces like beds or couches. Your folds will be sharper and more precise.
Align Edges Carefully
Match the edges and corners perfectly before folding. Misaligned edges cause uneven folds. Take time to adjust the paper before pressing down. This step is key for a balanced crane shape.
Use Your Fingernail To Crease
Run your fingernail along the fold to make a sharp crease. A strong crease keeps the paper in place. Avoid using thick tools; fingers work best. This helps your crane hold its form.
Fold Slowly And Gently
Do not rush your folds. Slow folding prevents tears and mistakes. Gently press the paper to avoid wrinkles. Careful folding results in a smooth, elegant crane.
Creative Variations
Creative variations make paper crane folding more fun and unique. You can change colors, shapes, and sizes. Each variation gives the crane a fresh look. Try new styles to keep your craft interesting.
Using Colored And Patterned Paper
Colored paper adds life to your crane. Choose bright or pastel tones. Patterned paper creates beautiful effects too. Stripes, dots, or floral prints make your crane stand out. This choice is perfect for gifts or decorations.
Adding Decorative Details
Draw eyes or small designs on your crane. Use markers or stickers to add detail. Tiny paper flowers or glitter can decorate the wings. These small touches make your crane more special and personal.
Changing The Size Of The Crane
Try folding cranes in different sizes. Small cranes are cute and delicate. Large cranes make bold decorations. Use bigger paper for a dramatic effect. Mix sizes for a creative display.
Experimenting With Paper Types
Try folding cranes from different paper types. Tissue paper gives a soft look. Wrapping paper adds shine. Origami paper folds easily and holds shape well. Each type changes the feel and style of your crane.

Frequently Asked Questions
What Materials Are Needed To Make A Paper Crane Bird?
You need a square sheet of paper, preferably thin and crisp. No scissors or glue are required for traditional origami. Optional tools include a bone folder for sharp creases. Using origami paper enhances the final look and ease of folding.
How Long Does It Take To Fold A Paper Crane?
Folding a paper crane typically takes 10 to 20 minutes. Beginners may spend more time learning the steps. With practice, the process becomes faster and smoother. Patience is key to achieving neat and precise folds.
What Are The Basic Folds For Making A Paper Crane?
The main folds include valley folds, mountain folds, and squash folds. You start with a square base and create the bird base. Each fold builds the crane’s wings, head, and tail. Mastering these folds is essential for a perfect crane.
Can I Use Any Paper Size To Make A Crane?
Yes, any square paper works, but size affects detail and difficulty. Larger paper is easier for beginners to handle. Smaller paper makes a delicate, compact crane but requires precision. Origami paper often comes in ideal sizes like 6×6 inches.
Conclusion
Making a paper crane bird is fun and simple. You only need some paper and a few folds. Practice helps you fold better and faster. Each crane you make is unique and special. This craft can calm your mind and boost creativity.
Share your cranes with friends or decorate your space. Keep folding and enjoy the peaceful art of origami. Making cranes connects you to a long tradition. Try different paper colors and sizes for variety. Keep creating, and your skills will grow every day.


